Just a quick shot of the fired bronzclay hollow forms- my free form number hollow bead on the right developed a few fine cracks and must have had a weak spot of the back since it has the most damage. It was fired on its side, so maybe I sanded it too much- can’t say as I really remember since the forms were made more than a year ago. 

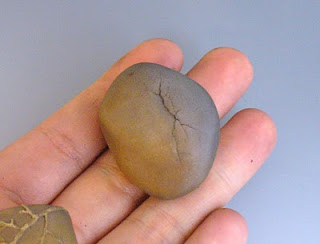
I’d like to get a nice patina on them that is a little more permanent than what the firing medium gives. Any suggestions?
handmade
Gearing up for BABE! 2010
The blog has been woefully neglected (again) while I’m trying to get as much done as possible during my short spurts of free time, i.e. nap time. As my dad loved to say, “I’m busier than a one-legged man in an ass kicking contest.”
Not sure if the slip-painted pattern on the left is too weird- the inspiration came from two different sources: the grease trail in my frying pan and one design from a book of quilts. 
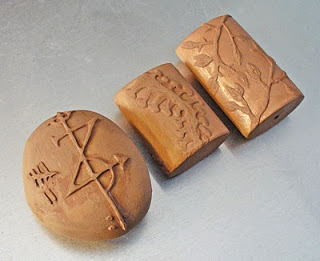
Oh, and these are some of the bronzclay hollow forms from more than a year ago that I’m finally getting around to using. Good thing they don’t go bad- although they’re hard as rocks to try and carve..hence, the slip painting.
Enamel Sampler and Do-Overs
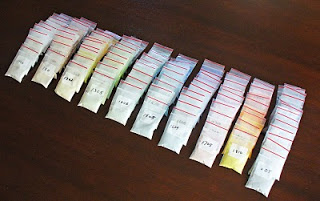
The Thompson Enamel Sample Pack for Med. Temperature Medium Expansion arrived in the mail on Friday and I immediately wanted to play around since my first attempt more than a year ago was..weak, to say the least. 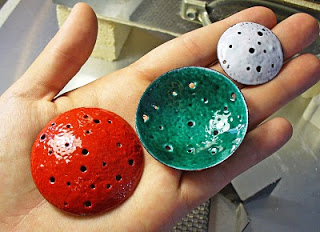
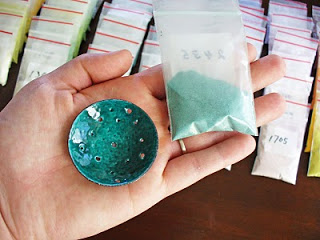 I usually have a hard time visualizing units of measurements. These packets are each around .5 oz. , usually .6 or .7 to account for the baggie I presume. Now, if I would’ve known on the website that they were each 1/2 oz. – it wouldn’t have meant much to me other than telling me it’s less than one whole ounce. So this is for other people like me who like to SEE what a measurement looks like, not just reading it 🙂 Hope that helps.
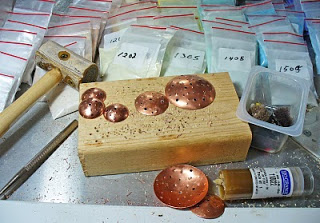
 My Turquoise pendant used .1 oz. Theoretically, I could make another 5 in this size before running thru my sample baggie- not bad, eh? The box w/ opaque and transparent enamel cost less than $90 w/ shipping. There are A LOT of colors- no, I haven’t counted yet..but I will.
 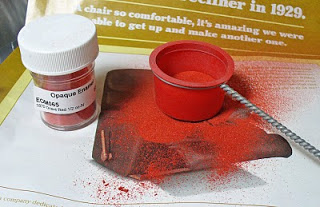 Oh, this red is so very luscious- Orient Red is one I’ll be reaching for quite often, no doubt.

 This is just the opaque colors, haven’t done the transparents yet..
Enameling on Copprclay is next, got some pieces and just need to clean them up. I’m currently cleaning and reorganizing my studio and will post pics of the space and some beads once it’s done.
Riveting Jewelry
 Makes me want to try and do it, too. Etsy Treasury
Big Hole Beads
Being part of an online exchange usually stretches my boundaries and makes me try something new. This time the exchange is for big hole beads and since I never do anything the easy way, I decided to see how well I could encase some long big hole beads, these were made on 1/4″ mandrels. The last pic is the four I made with only the two on the top pic making the cut for possible inclusion for the exchange. The second bead cracked since I admired it for too long and the one on the far right has a sharp end. I was able to make these with my Electric Mandrel Spinner– there’s no way my wrists could have managed otherwise. 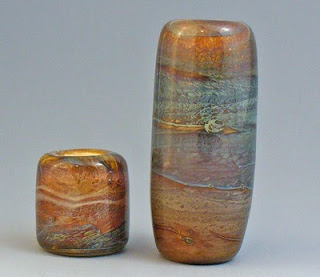 The short one is 14.5 mm long and the large one is 35 mm long or 1-1/4″.

I knew that thing would come in handy one day.
More Progress
Before LOS patina: Patina applied, think these will be beadcaps:
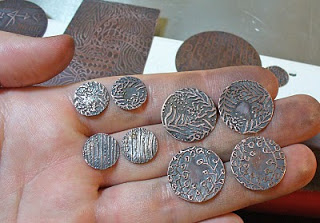 The patinaed copper plate/pendant, not sure what will become of this one:
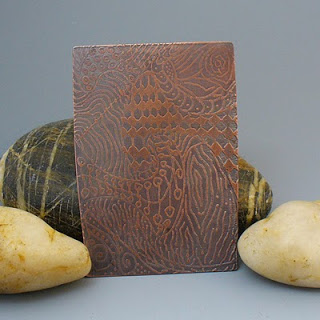 Is this one too…weird?
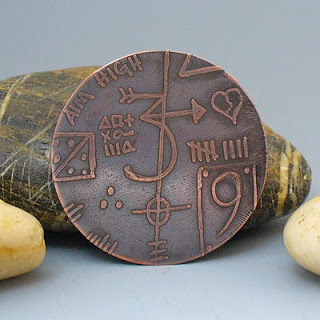
 It’s very reminiscent of the hollow form on the left, from a year ago.
Metal Etching WIP
 Apologies for the quick and dirty pic, wanted to have a step by step history for myself. Enjoyed doing my own version of Zentangles on some of the pieces. Depending on how these turn out, some may be used as bead caps on my hollows.
Etsy Update!
Finally getting around to re-opening my shop and putting up new work. These are smaller hollows than what I normally make- so if you like them snag them, because I didn’t make many.
These will be listed shortly:


Work, work, work
Trying to get the time to get all these listed is causing me a headache. About to head out of town for an appt. that will take most of the afternoon. Maybe tomorrow?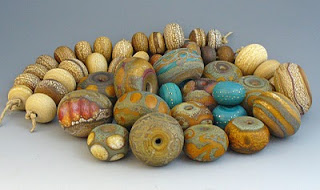
 Argh, and all of these still need to be etched and photographed..maybe the in-laws won’t notice me slipping off while they admire the little man this next week?
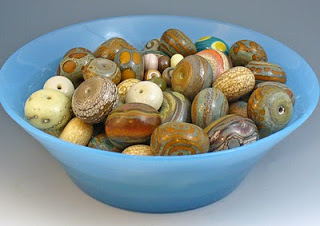
 And a closeup of a favorite bead.. still trying to figure out which color of coral it was.
 Pagoda Ring Class
The Pagoda Ring class at Ornamentea was great and especially nice since it was just me and one other student- which made it possible to pick our instructor’s brain. Ndidi was a great teacher and we learned how to etch, something I’ve been wanting to learn to do for years now and it’s so simple! There are a couple things safety-wise I might change, like the ventilation and wearing an apron, etc.


The leaf disc is Copprclay, not etched. For some reason my Copprclay hasn’t wanted to sinter properly..not sure what the problem is, but planning on opening a new packet and will see if that makes a difference.  A handy trick using tubing as a riser- got to use a tube jig for the first time and must say it’s pretty handy. Which reminds me that I need to get over my fear of the saw from HF and use it for things like this.
  Got lots of compliments for the texture on this ring, reminds me of tooled leather. Still need to do some finishing touches, like filing and cutting the extra length on my fastener.
A handy trick using tubing as a riser- got to use a tube jig for the first time and must say it’s pretty handy. Which reminds me that I need to get over my fear of the saw from HF and use it for things like this. Got lots of compliments for the texture on this ring, reminds me of tooled leather. Still need to do some finishing touches, like filing and cutting the extra length on my fastener. 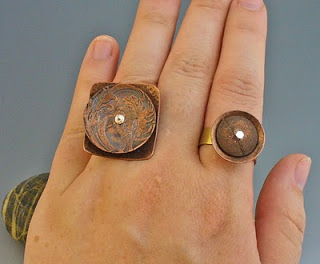 Stayed tuned for etched bead caps and new work soon. Planning on re-opening my Etsy shop sometime this week, just have a whole lotta work to photograph.
