More Carving on COPPRclay

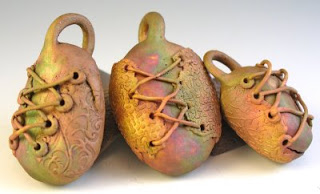
I was hoping to have at least one of my faux bone pendants done to show for Monday, looks like I may get it done Monday evening or Tues morning. Carving metal clay and sawing out pieces of faux bone for pendants, etc have taken up my free time this weekend.

It does seems slightly easier to carve into freshly dried clay rather than one that’s been laying around for weeks. Taught myself to rivet tonight also while trying to get one pendant put together, here’s to getting more finishing done tomorrow.

These pics were hard to get right due to the reflection from the polished copper. I hope you can at least see some of the detail- should be much easier to see tomorrow when I hope to add some color, etc. to the surface.

Had an unfortunate accident w/ my diamond shaped number 9 pendant while polishing- it is somewhere in the dark abyss of my studio.. Which reminds me of a joke:

Why is 6 afraid of 7?

Because 7 ate 9!

Maybe it will show up in the light of day tomorrow. One can always hope.

Carving Practice- Numbers

Thought I’d get some carving practice in since I haven’t tried it yet for metal clay. These are back sides of pieces I haven’t fired that have just been sitting around. I carved them in order: 7, 9, 3 and lastly 5. It’s easier when the number is bigger w/ the size of nib I was using- a #1 on my Speedball cutter.
The numbers were free-handed w/ pencil onto the copper clay, this was pretty fun and relaxing..as long as you don’t mess up, lol.
Another thing I’m wondering is whether it’s a little easier to carve the pieces when the clay has just dried instead of these pieces that have been waiting for weeks to be fired? Hope to get around to testing my theory this afternoon if I have time.
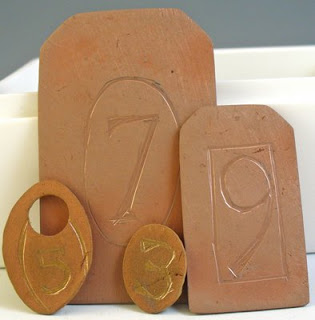
Not sure what it is about using odd numbers, they seem to look better to me for some reason.

New Beginnings- Faux Bone

I’ve had this sheet of 1/8″ thick 8″x8″ sheet of Faux Bone glaring at me for weeks now and I couldn’t take it any more.

Although this is my first time using a jeweler’s saw on my own, I don’t think I did too bad..are you supposed to use beeswax when cutting faux bone? I didn’t, but may try it next time just to see if it makes a difference.
Still deciding on designs and colors but it is exciting to have a blank canvas like this that is easy on the wallet.

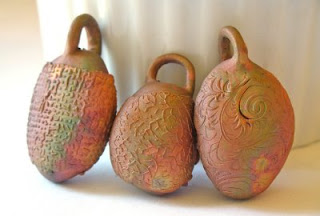
There is still lots of finishing to be done, hope to get one piece completed by the weekend.

The bracelet is fired and I’m so happy that all the links stayed together! The links’ width is 1 mm to give you and idea of thickness.It’s light and airy- I measured and it can be worn on the last link at 8-1/2″ and fits me on the next to last length at 7-1/2″.
The beadcaps are 9 mm, Copprclay daps like butta! I’m going to put a couple on a bead and see how the hole corresponds to a 3/32″ mandrel. I tried to get a good pic of the bracelet on, but my camera died after only getting one shot..gotta find some more batteries.

COPPRclay Bracelet

This is what I’ve been sweating and cursing over the last few days- carving some charms to add to it has been on my mind but those can always be added later. I’m just hoping that I managed to get the seams joined well enough, working so thin was a little tricky but I wanted it to look light and airy. The links are all uniform due to my Makin’s extruder and wrapping the snake around an oval and circular form to get the shapes.
Now I have plenty of open links that haven’t been sealed shut, lots of possibilities- maybe a necklace or another bracelet?


One thing I’ve learned from using the extruder to make the snakes is that the clay should be fresh and not reconstituted- otherwise it will look rough and fall apart more easily.

Another Experiment

Another experiment w/ unexpected results- these are Bronzclay pieces coated in a thinned layer of gesso, allowed to dry and then painted with metallic Lumiere paint that can be used on fabric. The colors are a little too bright for me, I grabbed these paints since I couldn’t locate my Prismacolor colored pencils.
Once I find my colored pencils, I’ll try this experiment again.

Patina Experimentations

Didn’t mean to be absent for so long- life and active baby keep me pretty busy 🙂
Sooo, I’m not sure if these would considered success stories since it didn’t patina the way I wanted- prolly need to look into a different ammonia since this one only patinaed certain spots on the metals. Maybe just straight ammonia would be better- no froufrou lemon scents, etc..what can I say- my options were limited at the store, lol.
The cheesecloth bracelet was my first try and it stayed in the ‘fuming tent’ overnight and this is what it looked like- one caveat: I forgot to use distilled water when I dunked it in the saltwater solution. Could this make a big difference?
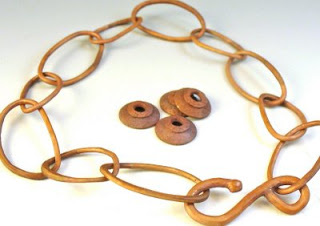
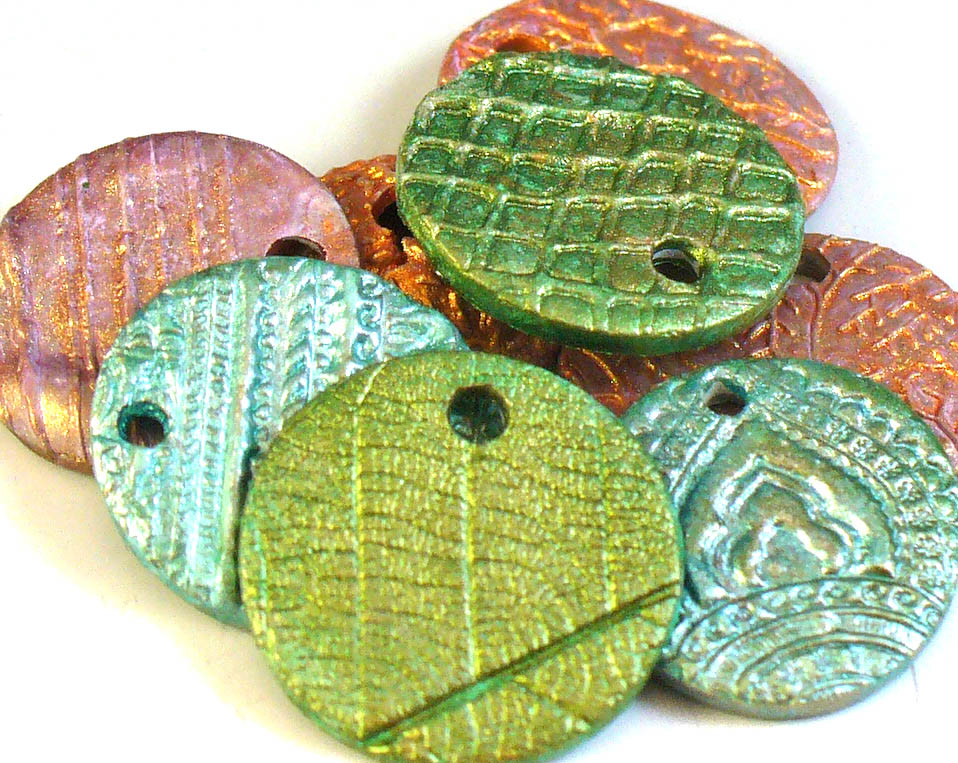
On my second try I remembered to used distilled water and added more kosher salt to the mix. These stayed in the container for about 5 days- after the second day I didn’t notice any extra patina growing, but left them in there just to see if any more color would deposit. Something odd about this batch is that the area of patina had/has a slightly shinier look than the rest of the metal- almost like plastic. Is this due to the longer duration or maybe the additives in the ammonia? 
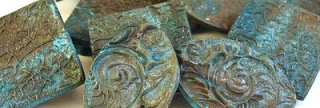
Another thing I noticed is that this process seemed to darken the copper clay slightly. I plan on ordering some sanding and polishing accessories so I can clean the metal better- this could also have affected my results. It was a fun experiment and I mean to try again when I have better ammonia and cleaning tools.

Patina Experimentation

I’m going to try and patina my cheesecloth bracelet!
This is the only ammonia I can find in the stores, places like Target don’t carry it. Maybe grocery stores are most likely to carry products like this? Not even sure that this is the correct ammonia to patina metal. We’ll find out in the morning!
Here is what I’ve done so far:
Found an empty plastic container w/ lid and poked two holes in top to string bracelet up so it doesn’t touch ammonia in bottom of container. I used twine as my hanger, hope it doesn’t matter what the material is.
Folded a paper towel and placed it in the bottom of the container, then poured ammonia to saturate. Left this outside since I’m sure it will be stinky.
Next, I tied my loop and hung my bracelet.
After mixing the salt water solution, I dunked my suspended bracelet- I didn’t want to touch it w/ my hands and get oil on it.
Since my bracelet is already attached to the lid via the string, all I had to do was put on the lid and set the container someplace it won’t get knocked over outside.

I’ll try and post pics of the results in the morning, if I have time. My friend, Sheryll, is getting married down in Big Sur tomorrow, I hope the weather is gorgeous for her big day!

Suddenly Seeking

Originally uploaded by Anahata Katkin

Vickie Hallmark tagged me, who was tagged by Catherine Witherell to share “What are you about right now?”. Feel free to join in! Just remember to link back to this post so everyone will be able to see what others are writing.
I’m suddenly seeking:
Patience for: teething baby, loud neighbors, smoothing joints and final sandings
Practicing: kindness, listening better, empathy, hollow forms, links and organizing
Looking for: the perfect dress, comfy shoes that go w/ everything, the willpower to lose the baby weight, the time/money to take a class/buy pieces from Celie Fago, Diana Fayt, Andrea Guarino, Mary and Lou Ann, Robert Dancik, Susan Lenart Kazmer, Angela Gerhard
scented drawer papers, this room, some delicious korean food, pots de creme,
a girls’ night out at Fifi’s
follow thru
Improving at: prioritizing, organizing, not procrastinating, de-cluttering
crashing waves, blue, clear skies, soaring birds, chubby little hands, the sound of my son’s laughter, hugs, family, crisp sheets, feathers, fog, Hwy 1, lavendar: the color and scent, her artwork, travel, Italy, gelato, stone houses, poppies, gondolas, mosaics, Etsy, her blog, lucid dreaming, ideas journal, enameling, peonies
Always seeking: beauty

Copprclay Pieces Fired

These were fired in the acid-washed coal based carbon rather than coconut- I keep forgetting to switch it.
*Please ignore the loose pieces of charcoal since these haven’t been cleaned yet*
The patina is what was present after fishing them from the firing chamber. You can see the smallest has a tear on the bottom where my seam was weak- turns out it’s not that big a deal to refire it since I need to add a jump ring so it will hang correctly. Let’s hope it’s not difficult to fix.