metal clay

Time Rushing

 These past few weeks since our move have been slipping by rapidly- can’t believe I’m nearly 8 months along now. The San Antonio heat has been sapping my motivation to get things done, and it’s not even summer yet.
 Decisions for our baby girl’s room took me forever, nothing seemed right and I couldn’t make up my mind..similar story for these bronzclay pieces. There is a nebulous idea floating about in my head, but the harder I try to focus on it, the more blurry it becomes. So my favorite fall-back option is in effect- I’ll just wing it. It seems like forever since I’ve fired any metal clay, even had to look up the firing schedule to jog my memory.
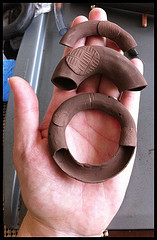
 I’ll have to show a pic of the backs after they finish firing, my idea was to have the option of stringing or wearing them as a brooch. A technician I am not, so we’ll see if my idea pans out. What a pain in the posterior curved hollow forms are! Not sure why this was my idea of a smooth re-integration with metal clay.
Color is also something that has been nagging at my thoughts, and getting to use up some polymer clay that has been lurking in my closet (some of it for years!) is a bonus. Maggie Maggio and Lindly Haunani’s book was a great learning tool. Maggie has a lot of great info and videos floating about on her website and youtube. Her color aesthetic is very appealing to me since I usually reach for those earthy/mud colors because they usually fume so nicely in glass. I’m proud of myself for getting all those colors mixed together and finishing this exercise, it will be a wonderful color tool for whichever medium I decide to use.
If the hollow pieces survive my somewhat inept touch, I’ll post pics tomorrow.
Advertisement

A Happy Accident

My first try w/ Fast fire Bronzclay seems to be a success. To be completely honest, this is my second firing of this load since I accidentally used the acid-washed carbon rather than the coconut shell. Also bumping up the firing temp to 1545 rather than 1525 seemed to help, too.
The colors were quite a surprise! I figured they would be dull and maybe slightly gold-toned. The first ones out of the firing pan (the 8 bead caps near the 5 o’clock position) were not too colorful, but still have some interesting patterns on them. It wasn’t until I swirled my stainless steel hemostat around in the medium trying to fish some out -with my respirator on- that I noticed a flash of color change. 
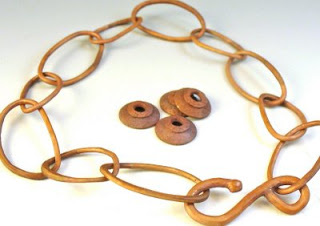
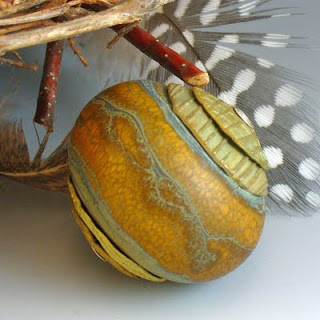
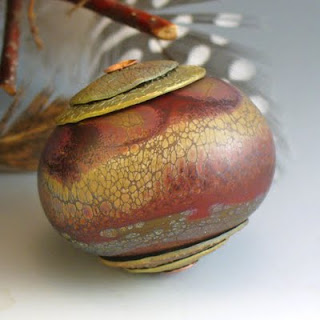
The bright orange was a complete shock since I’ve never gotten such vivid color from the coconut shell carbon. Another thing that seemed to help was almost fishing it out and then re-submerging it in the carbon. That’s how I got some of the raku looking pieces. The far left are the ones that were on the very bottom and so they stayed in the longest. In case anyone is interested- I fired at full ramp to 1545* holding for two hours. I had my pan up on kiln posts, and the lid was not fully covering the container. After it was done firing, I removed the kiln lid around 1300* and left the pan- still covered w/ the lid- in the kiln until the temp read ~230-250. Can’t remember the exact number now, should’ve written it down. After removing it carefully from the kiln, I searched for my hemostats and started digging for the bead caps soon after. Et voilà!

Slow Progress

I feel like the tortoise instead of the hare trying to get my inventory built up for my first show next month. But I suppose since the tortoise won in the end, this sort of progress is good. My Etsy shop will be lacking in love and new items since most everything will be going w/ me to Oakland.

After making these and falling in love it reminded me of a friend saying she could never work in an animal shelter since she’d fall in love w/ all the animals and want to bring them home. My beads have metaphorically morphed into cute animals that I don’t want to let go, lol. But just like at the animal shelter, these beads need good homes, too. 🙂

One possible reason I may not want to let them go is due to the amount of work invested into each one. The beadcaps are made by me as is the bead and then they’re cored after all the prepping is done on the tubing. At least an hour’s time is put into each bead- this isn’t including the times in the kiln for annealing the bead and firing the bronzclay.
Now I’m just waiting on more sterling and copper tubing to come in the mail so I can get more made. Ordered from Metalliferous and they were super nice and had awesome prices!
I’ve been field testing a smaller peg w/ my Impress Bead Liner and it’s mucho easier adding bead caps instead of trying to just core the bead. I’m not sure why, maybe it’s just me. Doing beads like this also makes me think sterling tubing is a little more ‘elastic’, I guess you could say, than copper. Or maybe I just need to compensate and cut the copper slightly shorter. Anyhoo, it’s still a work in progress, but I’m so glad to be able to make this style that has been stewing in my mind for a while now.
Let’s just hope they do well at the show..

Slip Painting Again

Slip painting is harder than it looks, let me tell you. Or maybe I’m just not doing it right? If you look closely you can see how my lines look slightly imperfect *ok, let’s not belabor the fact that it’s more than slightly*..what do most people who slip paint so to keep their lines, etc. looking perfect? Is it just lots and lots of practice or something else?
I tried to correct my mistakes by using one of my half round files and sanding the edges, but it’s still not quite perfect. Maybe I should embrace the idea of Wabi Sabi and be happy w/ what I’ve accomplished? Hmm, maybe that’s a better idea, lol.
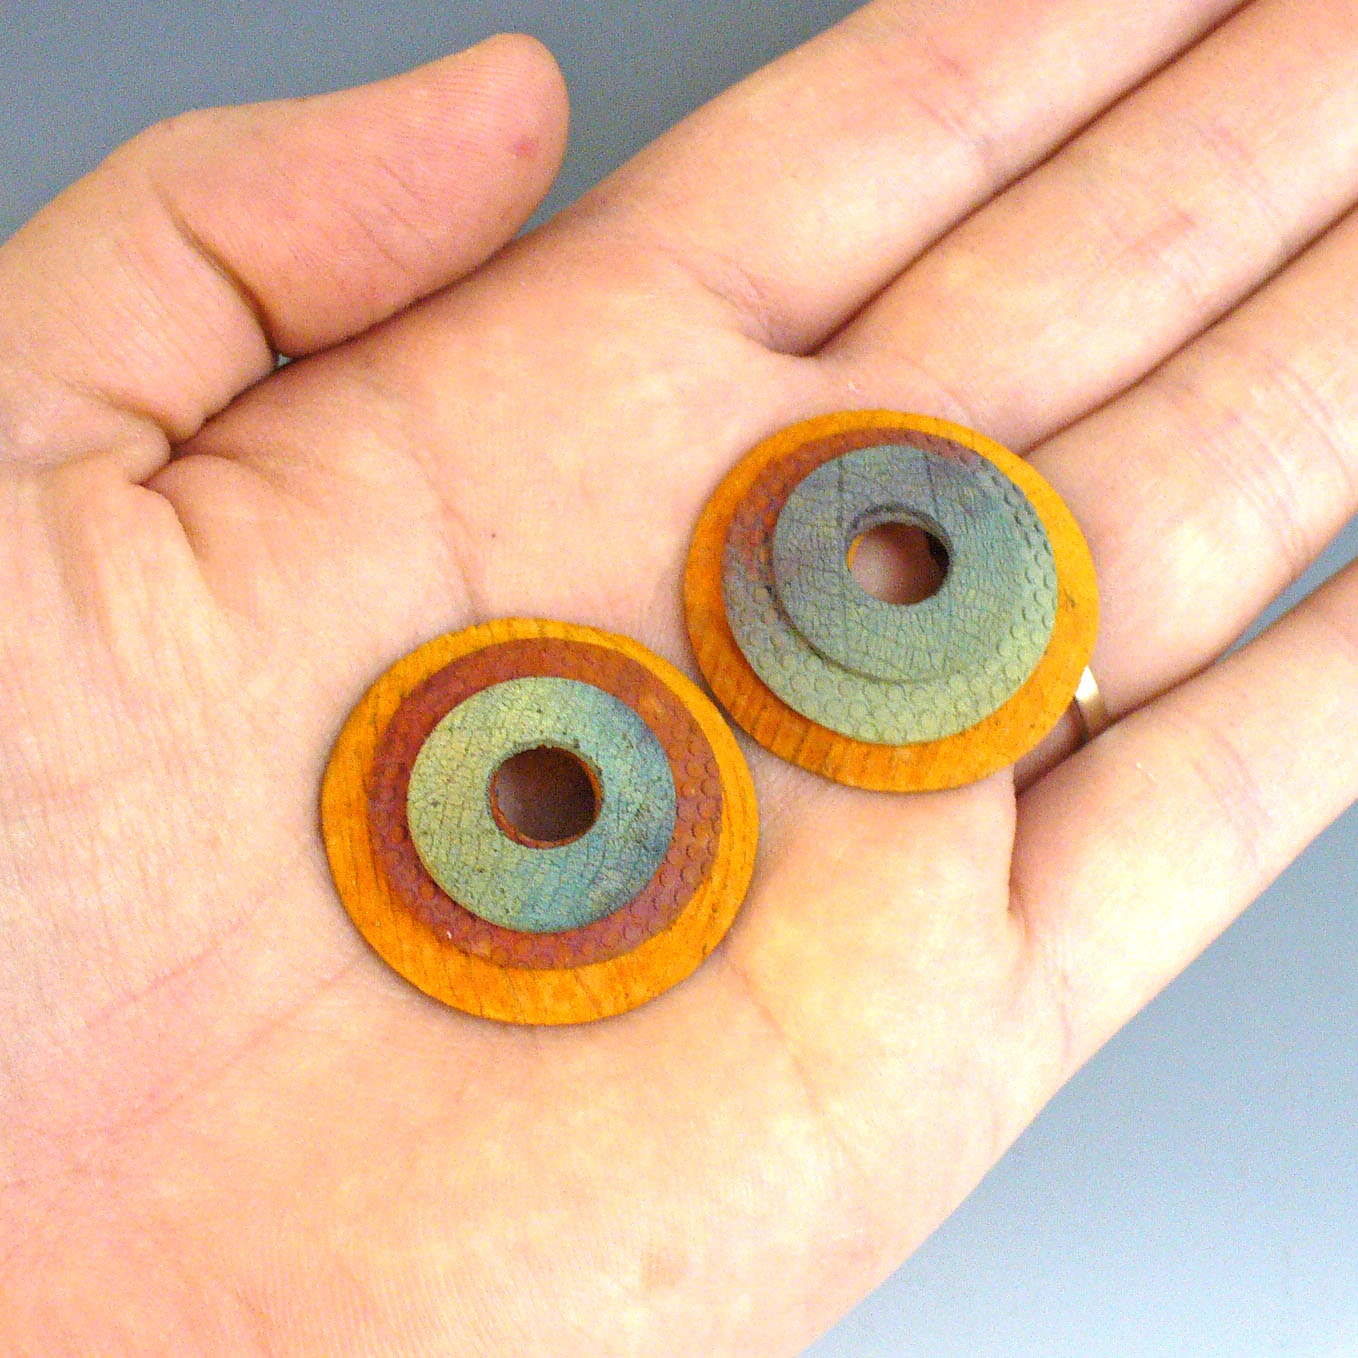
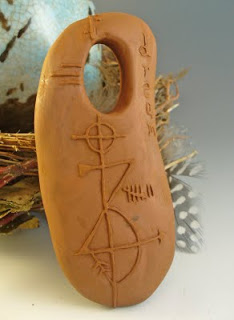
Still obsessed w/ this style- is it too odd? I hope not since I’m compelled to keep doing it. It’s starting to feel like a stylized type of architectural line drawings..only w/ numbers and other symbols worked in.

Now the main thing I’m worried about is trying out shelf firing a la Angela Crispin and Catherine Davies Paetz on the hollow forms- has anyone done hollow forms successfully this way?

Slip Painting Experiments

Tried to slip paint w/ Copprclay for the first time today, I think I still need to work on getting the consistency just right..
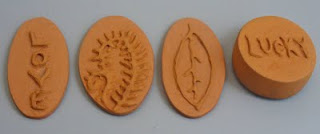
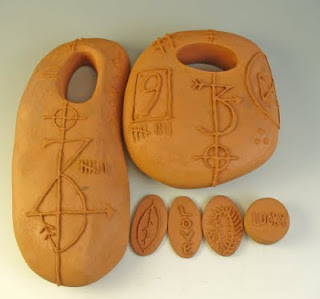
The leaf had three layers and the rest around half a dozen layers of slip- thank goodness I have a handy-dandy mug warmer to dry my pieces lickety-split.

My hand developed a bad habit of shaking at inopportune moments while trying to do close work on my fern, hence the slightly odd placement on some fronds. Is frond the right word? anyhoo, it was fun and I still need to settle on a design for my BIG hollow forms.

Carving Practice- Numbers

Thought I’d get some carving practice in since I haven’t tried it yet for metal clay. These are back sides of pieces I haven’t fired that have just been sitting around. I carved them in order: 7, 9, 3 and lastly 5. It’s easier when the number is bigger w/ the size of nib I was using- a #1 on my Speedball cutter.
The numbers were free-handed w/ pencil onto the copper clay, this was pretty fun and relaxing..as long as you don’t mess up, lol.
Another thing I’m wondering is whether it’s a little easier to carve the pieces when the clay has just dried instead of these pieces that have been waiting for weeks to be fired? Hope to get around to testing my theory this afternoon if I have time.
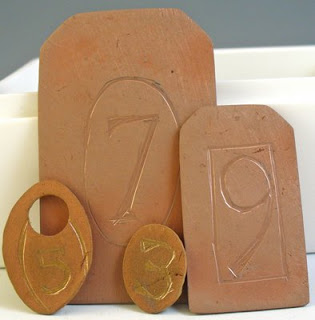
Not sure what it is about using odd numbers, they seem to look better to me for some reason.

The bracelet is fired and I’m so happy that all the links stayed together! The links’ width is 1 mm to give you and idea of thickness.It’s light and airy- I measured and it can be worn on the last link at 8-1/2″ and fits me on the next to last length at 7-1/2″.
The beadcaps are 9 mm, Copprclay daps like butta! I’m going to put a couple on a bead and see how the hole corresponds to a 3/32″ mandrel. I tried to get a good pic of the bracelet on, but my camera died after only getting one shot..gotta find some more batteries.