Uncategorized

Translating Work from One Medium to Another

I can’t seem to get this design off my mind- finally realizing the significance of 3, Z makes our little family a trio.

Now I wonder if the design may pop a little more if the glass were etched..something to do later. Another thing I noticed while making this bead is that the stringer needs to be much thinner in order to get the same amount of detail similar to my faux bone pendant. Not that I want them to look exactly the same, but I’d have a little bit finer look in the details.
*Is that correct English, or did my Kentuckiana upbringing shine thru? lol. *

The deets: the focal base is ‘curdled’ ivory w/ stringer work of Double Helix’s new silver glass, Ekho. It was repeatedly heated and cooled while putting the stringer down and then finally briefly flashed in a reducing flame. I’m pretty sure regular Moretti Dk. Ivory would have curdled just the same since I had to repeatedly flash and cool while putting it back in my Kalera Long and Lean press to refine the shape.

Is Bigger Better?

These pieces were total impulses yesterday when I had some time to play w/ Copprclay.

The long one is approx. 4″ x 1-2/3″ and weighs in at 48 grams- they’re both hollow forms. The round-er one is 2-3/4″ x 2-1/2″ and weighs 45 grams. It’s a good bit of clay at 93 grams total.
I have to give credit to my friend, Sadie, since we were admiring her beautiful copper clay pendant at our last get together in Walnut Creek. Hers was more similar to the rounder one, and it had started developing this wonderful patina that was shiny and iridescent in certain spots.
I’d like to try painting a pattern on w/ slip, but probably need to practice on a less important piece. The long one is calling for something botanical, at least on one side- maybe a fern..
Then again, it is Copprclay and can be enameled. So many choices!

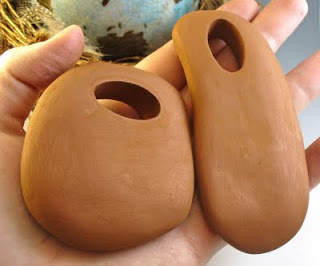
It’s so nice to hold the long one in my hand, almost like a worry stone. I’m itching to get at least one done before the weekend’s over, crossing my fingers it won’t be crazy again like the last.

Enamel Experiments

I’ve had these pieces for more than a week waiting to be photographed. They’re by no means professional, but I wasn’t expecting much for my trial run w/ enameling. It was fun to play and get a feel for the process. The colors used were: bitter, cobalt and I believe the red was oriental red. The sample enamel kit is from Whole Lotta Whimsy and is a good way to learn before investing too much money. There are 12 colors in my kit and most of them are more primary/ bright than I normally would use since I love muted/tertiary colors. It is worth it though since I don’t know what I’m doing exactly, lol, and if I mess up it’s no big deal. 
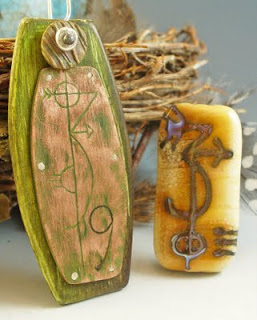
These were pieces snipped from a thinner gauge of copper sheet I had laying around. I didn’t think to bring some pieces of copprclay to play w/- next time.
I practiced sgraffito and I think the reason my pieces look so mottled is that I didn’t let my white liquid enamel layer dry completely. What can I say, I was on borrowed time since my wonderful neighbor was watching Z for a few hours so I could try enameling.
Tomorrow I’ll post some pics of my faux bone pieces I’ve also had sitting around for more than a week..

Glass Practice

It’s been quite some time since I’ve had time to torch and it shows in my shaping and encasing skills. My plan is to make more time to devote to the torch so my skills don’t get so rusty again.

After cleaning my space to make room to enamel, I discovered some old oddlots I hadn’t used in quite some time. One of them is the silver rich K-65 from Double Helix Glassworks. They’re the blue big holed beads in the pictures.

I also used Reich. Silver Brown, Aurae and some of its oddlots, GT Mountain Honey and Aether clear to encase.

More Carving on COPPRclay

I was hoping to have at least one of my faux bone pendants done to show for Monday, looks like I may get it done Monday evening or Tues morning. Carving metal clay and sawing out pieces of faux bone for pendants, etc have taken up my free time this weekend.

It does seems slightly easier to carve into freshly dried clay rather than one that’s been laying around for weeks. Taught myself to rivet tonight also while trying to get one pendant put together, here’s to getting more finishing done tomorrow.

These pics were hard to get right due to the reflection from the polished copper. I hope you can at least see some of the detail- should be much easier to see tomorrow when I hope to add some color, etc. to the surface.

Had an unfortunate accident w/ my diamond shaped number 9 pendant while polishing- it is somewhere in the dark abyss of my studio.. Which reminds me of a joke:

Why is 6 afraid of 7?

Because 7 ate 9!

Maybe it will show up in the light of day tomorrow. One can always hope.

COPPRclay Bracelet

This is what I’ve been sweating and cursing over the last few days- carving some charms to add to it has been on my mind but those can always be added later. I’m just hoping that I managed to get the seams joined well enough, working so thin was a little tricky but I wanted it to look light and airy. The links are all uniform due to my Makin’s extruder and wrapping the snake around an oval and circular form to get the shapes.
Now I have plenty of open links that haven’t been sealed shut, lots of possibilities- maybe a necklace or another bracelet?


One thing I’ve learned from using the extruder to make the snakes is that the clay should be fresh and not reconstituted- otherwise it will look rough and fall apart more easily.

Another Experiment

Another experiment w/ unexpected results- these are Bronzclay pieces coated in a thinned layer of gesso, allowed to dry and then painted with metallic Lumiere paint that can be used on fabric. The colors are a little too bright for me, I grabbed these paints since I couldn’t locate my Prismacolor colored pencils.
Once I find my colored pencils, I’ll try this experiment again.

Patina Experimentations

Didn’t mean to be absent for so long- life and active baby keep me pretty busy 🙂
Sooo, I’m not sure if these would considered success stories since it didn’t patina the way I wanted- prolly need to look into a different ammonia since this one only patinaed certain spots on the metals. Maybe just straight ammonia would be better- no froufrou lemon scents, etc..what can I say- my options were limited at the store, lol.
The cheesecloth bracelet was my first try and it stayed in the ‘fuming tent’ overnight and this is what it looked like- one caveat: I forgot to use distilled water when I dunked it in the saltwater solution. Could this make a big difference?
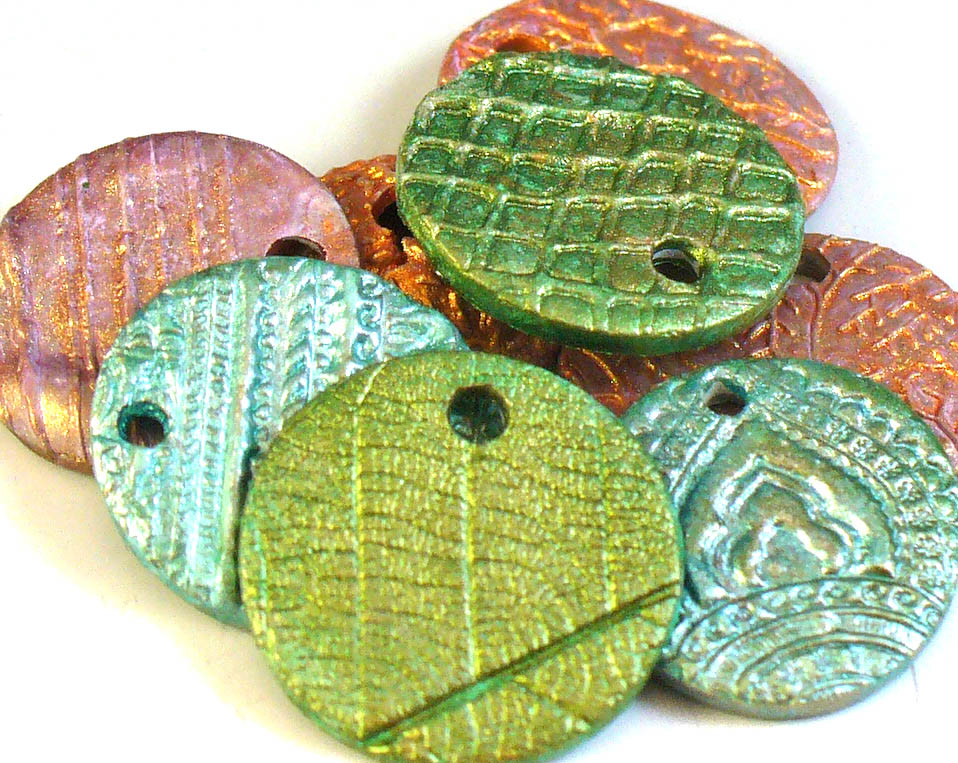
On my second try I remembered to used distilled water and added more kosher salt to the mix. These stayed in the container for about 5 days- after the second day I didn’t notice any extra patina growing, but left them in there just to see if any more color would deposit. Something odd about this batch is that the area of patina had/has a slightly shinier look than the rest of the metal- almost like plastic. Is this due to the longer duration or maybe the additives in the ammonia? 
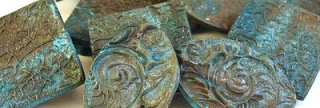
Another thing I noticed is that this process seemed to darken the copper clay slightly. I plan on ordering some sanding and polishing accessories so I can clean the metal better- this could also have affected my results. It was a fun experiment and I mean to try again when I have better ammonia and cleaning tools.

Patina Experimentation

I’m going to try and patina my cheesecloth bracelet!
This is the only ammonia I can find in the stores, places like Target don’t carry it. Maybe grocery stores are most likely to carry products like this? Not even sure that this is the correct ammonia to patina metal. We’ll find out in the morning!
Here is what I’ve done so far:
Found an empty plastic container w/ lid and poked two holes in top to string bracelet up so it doesn’t touch ammonia in bottom of container. I used twine as my hanger, hope it doesn’t matter what the material is.
Folded a paper towel and placed it in the bottom of the container, then poured ammonia to saturate. Left this outside since I’m sure it will be stinky.
Next, I tied my loop and hung my bracelet.
After mixing the salt water solution, I dunked my suspended bracelet- I didn’t want to touch it w/ my hands and get oil on it.
Since my bracelet is already attached to the lid via the string, all I had to do was put on the lid and set the container someplace it won’t get knocked over outside.

I’ll try and post pics of the results in the morning, if I have time. My friend, Sheryll, is getting married down in Big Sur tomorrow, I hope the weather is gorgeous for her big day!